Small Appliances
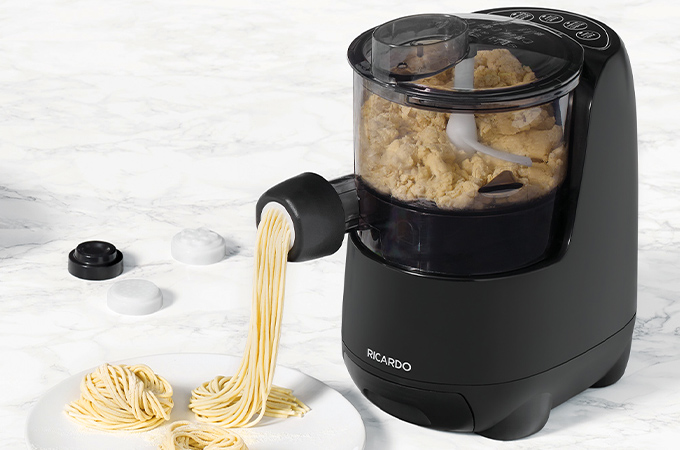
RICARDO Electric Pasta and Noodle Maker
How it works
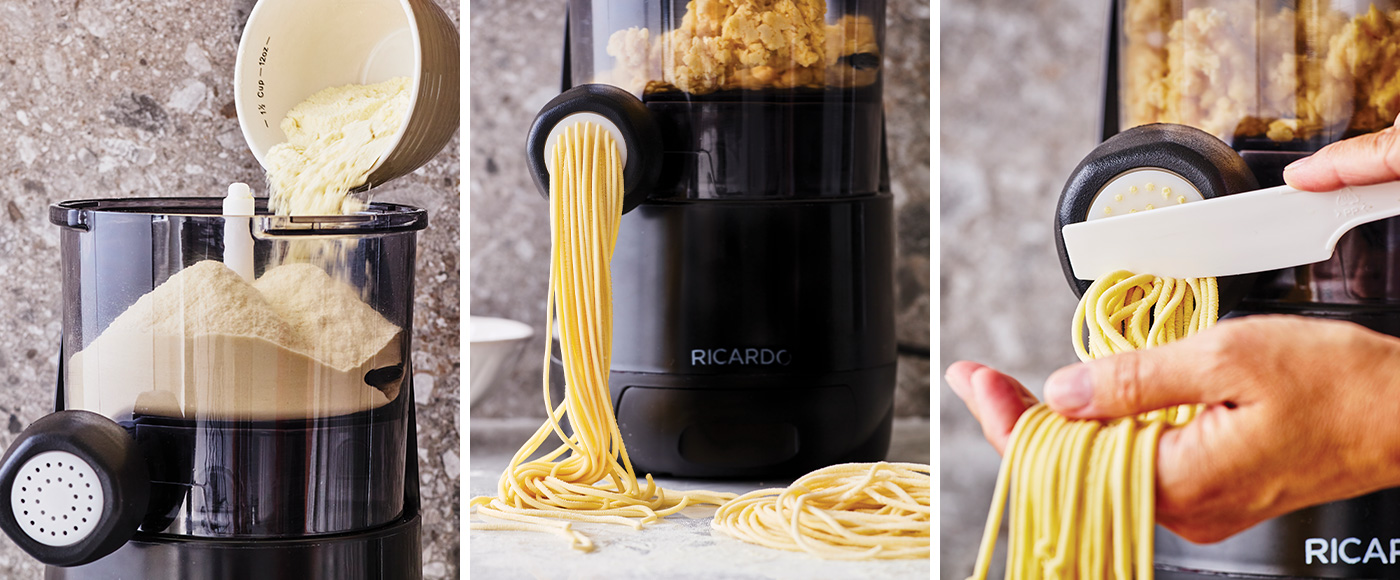
This machine is highly efficient. Everything is done automatically. Simply add the dry ingredients and liquids to their respective compartments. When you turn on the machine, the kneading begins, which lasts a few minutes, and then the extrusion of the pasta begins. This results in tasty pasta with very few steps, all in less than 30 minutes.
A well-designed machine
Our pasta maker sets itself apart from others on the market thanks to its ease of use, compact size and performance (it makes up to 600 g of fresh pasta at a time, or approximately four servings). Not to mention the quality/price ratio, which was a priority for us during its development.
The machine is powerful enough that it doesn’t need a lot of water to make great-tasting pasta. After all, less water means less sticky, and therefore more delicious, pasta.
Personalize your pasta
This machine allows you to make different varieties of pasta by changing their composition, in all shapes and flavours.
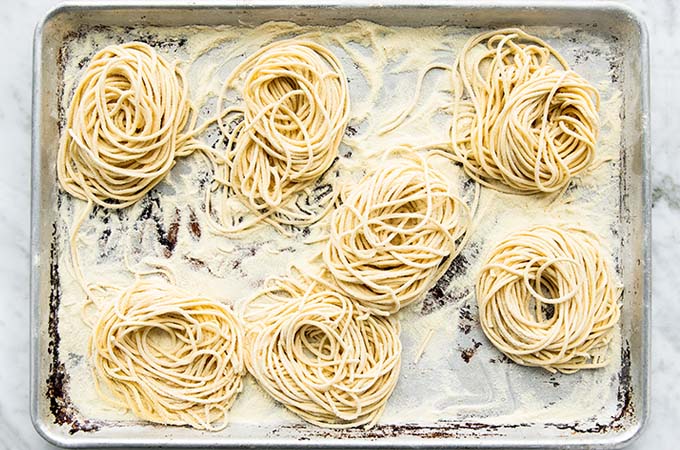
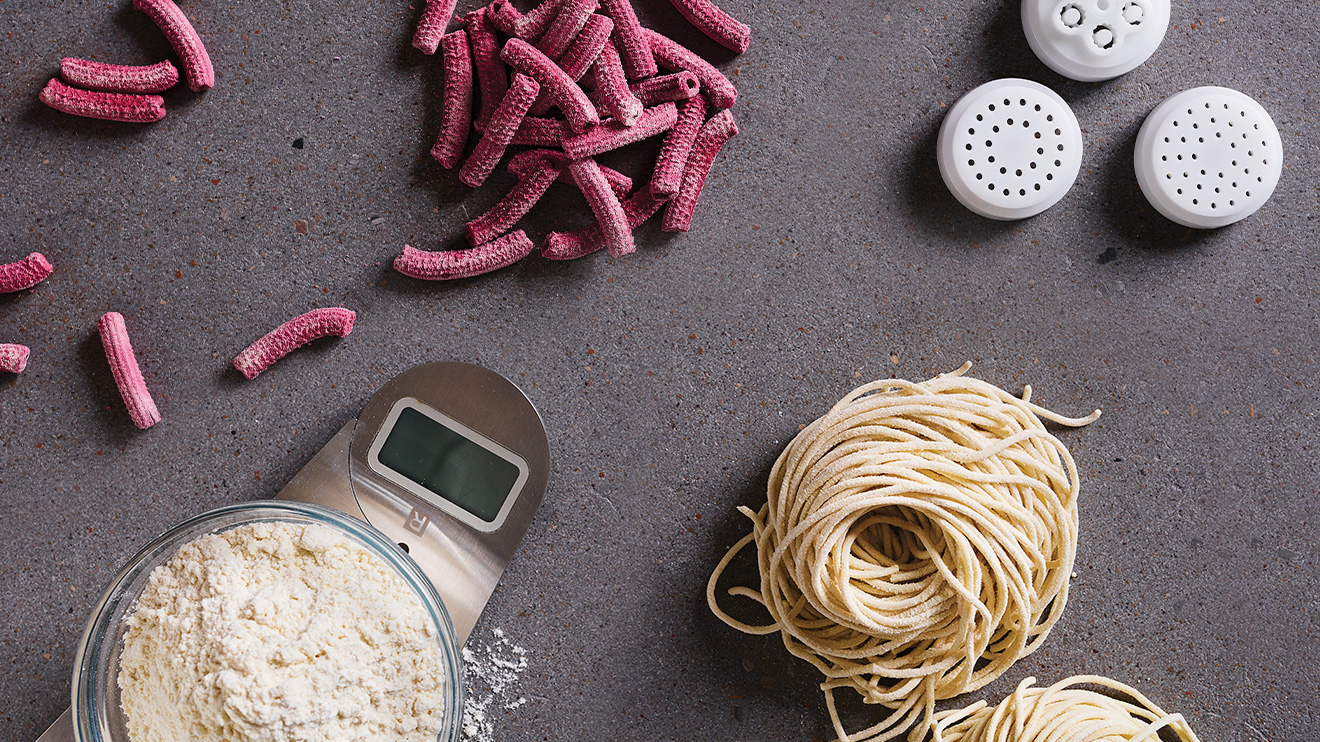
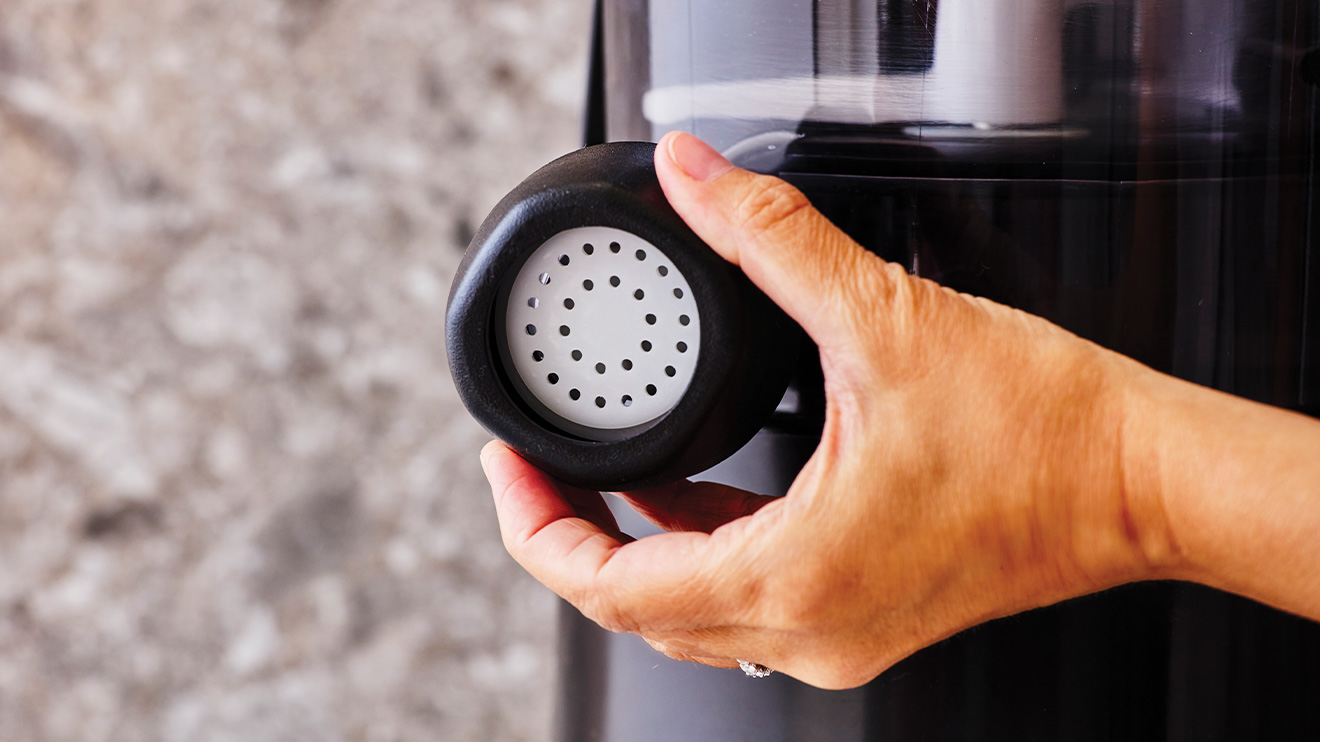
Shapes: Four discs for different pasta shapes (penne, spaghetti, spaghettoni and lasagna) are supplied with the machine. It’s a great way to create a variety of textures.
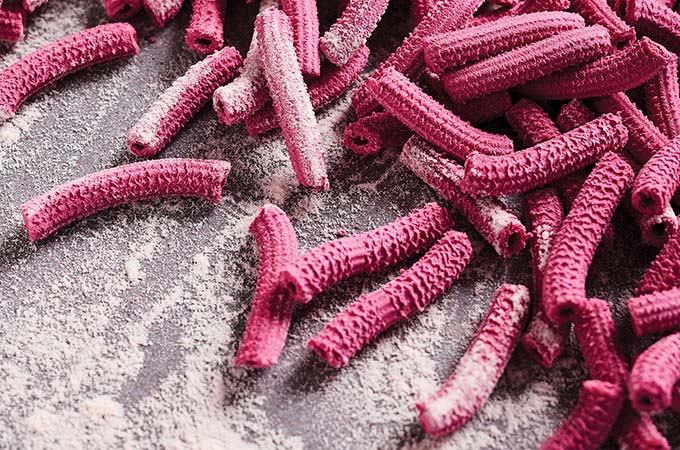
Flavours: If you want to add an ingredient to give colour to your pasta, such as carrot or spinach juice or even cocoa, it’s best to rely on the tested and approved recipes included in the instruction manual, so as to not change the proportions and to ensure good results.
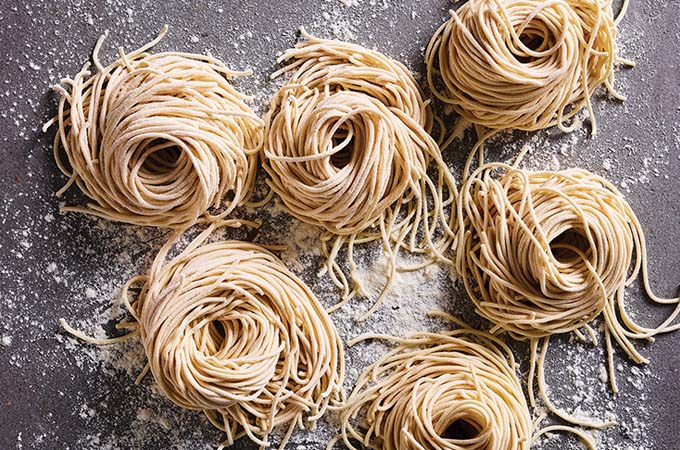
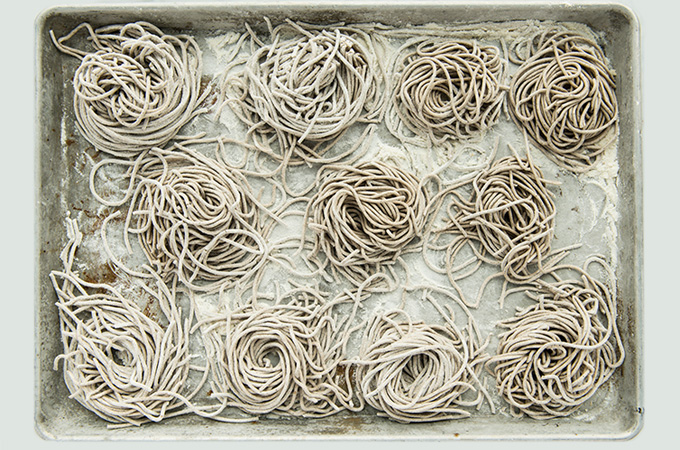
Types of pasta: You can make durum wheat or egg pasta, as well as fresh ramen noodles, which are usually hard to find at the supermarket. And the results are pretty impressive.
To get the most out of your machine, we suggest using a digital kitchen scale to weigh the dry ingredients. The measurements will be more precise, which will yield better results. Otherwise, for measuring the flour, be sure to use the cup included in the box. We recommend letting the machine cool down for about 30 minutes after each cycle, that is: each complete recipe. We also suggest not running it for more than two consecutive cycles.
Two modes for even more success
Automatic Mode: The Pasta and Noodles buttons on the control panel launch the machine into automatic mode. The machine mixes, kneads and extrudes pasta or noodles automatically.
Manual Mode: This mode allows you to experiment with other pasta recipes. The kneading mode lasts up to 6 minutes, but can be stopped at any time by pressing the Knead button again. When the consistency of the dough mixture is to your liking, you can then press the Extrude button to extrude the dough.
Fresh pasta in four easy steps
Here are a few basic steps for making any kind of pasta.
1. Upon purchase, the pasta maker is already fitted with the lasagna disc. The other three discs (spaghettini, spaghettoni and penne shapes) are in the drawer at the front of the machine.
2. Add flour and salt into the reservoir, ensuring you don’t exceed the limit of 500 g of ingredients. Turn the cover clockwise to the locked padlock icon to hold it in place.
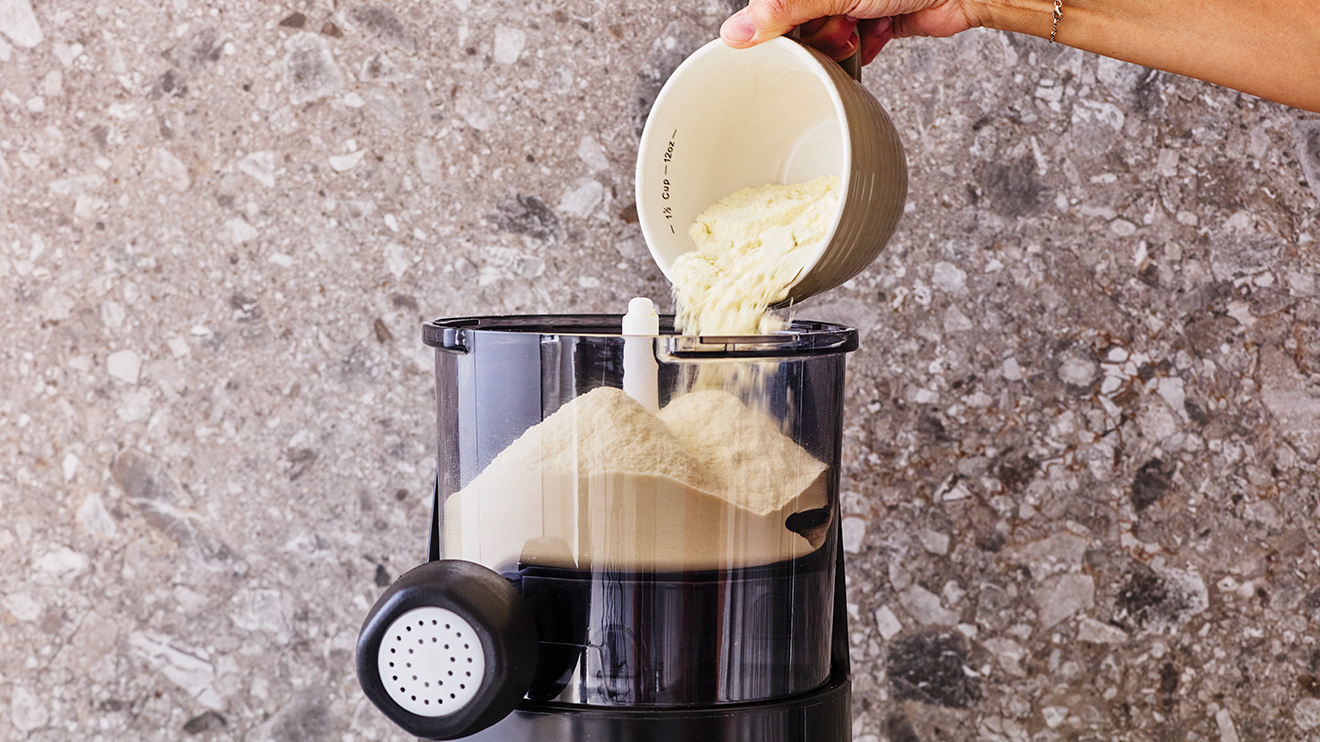
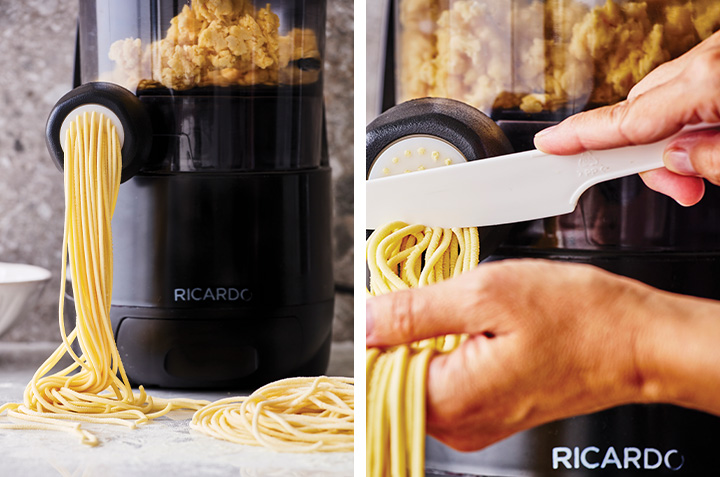
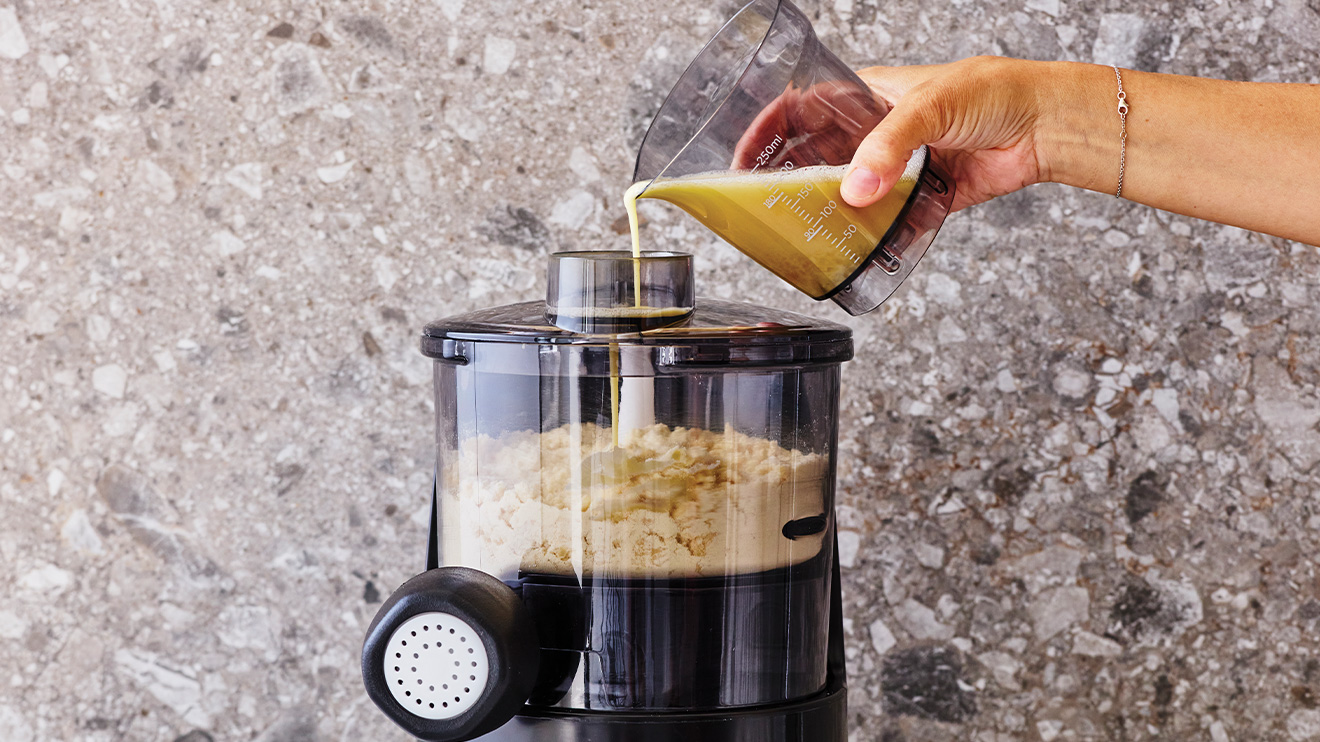
3. Press the Pasta or Noodles button, depending on the recipe you’re using, to select the automatic mode. The machine will begin kneading and continue for approximately four to five minutes, depending on the mode chosen. When the kneading phase begins, you may start to slowly pour the liquid ingredients into the opening on the top of the lid.
4. Once kneading is complete, the machine will go into extrusion mode and the formed dough will begin to come out. All that remains is to cut it to your desired length with the knife that is supplied.
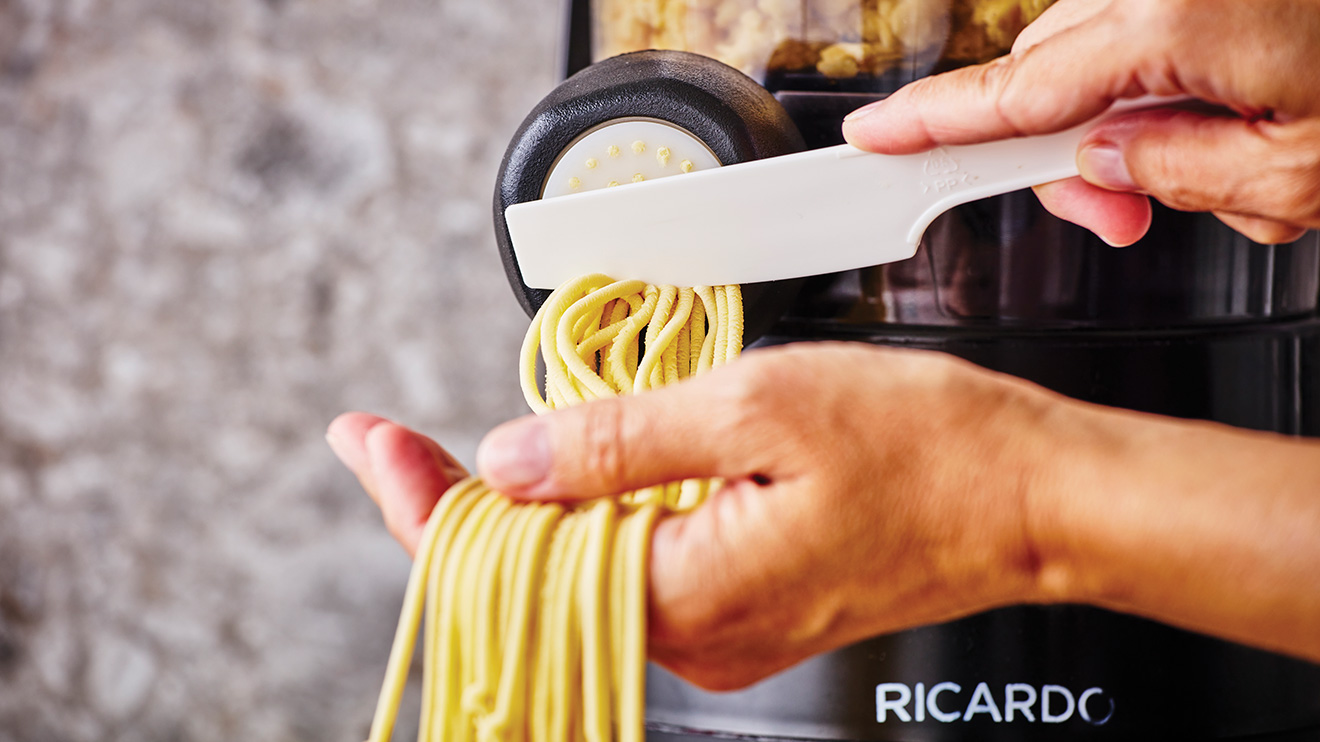
For best results, the pasta mixture should be neither too dry nor too wet. A crumbly consistency is what you should be looking for. If the dough is too dry, add 5 to 10 ml of liquid. If the dough is too wet, remove the cover and divide the dough. Add 2 tablespoons of flour and close the lid.
Easy cleanup
The removable parts can be put in the dishwasher, except for the base, which you wipe clean using a damp cloth. Otherwise, a small, pointed brush supplied with the machine can be used to easily hollow out the discs. Tip: If you put the discs in the freezer for about two hours, the remaining dough will harden and it’ll become much easier to remove. Cleaning and drying should be done after each pasta-making cycle.
Must-try recipes
All that's left now is to make some delicious homemade pasta! For a few quick and easy dishes to prepare, be sure to check out the recipes provided in the instruction booklet that comes with your pasta maker.
On our website you’ll find more inspiring recipes, such as homemade ramen noodles, homemade beet penne, homemade soba noodles and homemade spaghettoni with wheat semolina. To your machines!
ASIAN-INSPIRED RECIPES
Fresh Ramen Noodles
HOMEMADE RECIPES
Fresh Beet Penne
WORLD CUISINE
Fresh Soba Noodles